Crispy & Light: The Ultimate Homemade Wafer Cookies Recipe

There’s something magical about wafer cookies, their delicate crispiness, subtle sweetness, and the way they practically melt in your mouth. Whether you enjoy them as a light snack, a companion to coffee, or a crunchy layer in desserts, wafer cookies are a treat loved worldwide.
But why settle for store-bought when you can make crispy, homemade wafer cookies that taste even better? With this easy-to-follow recipe, you’ll learn how to create light, airy, and perfectly crisp wafers right in your kitchen, no fancy equipment needed!
What Makes This Recipe Stand Out?
Unlike many recipes that result in wafers that are too soft or chewy, this one focuses on achieving that ideal crisp texture. You’ll discover:
✔️ The key ingredients that make wafers ultra-light.
✔️ Baking techniques to ensure maximum crunch.
✔️ Expert tips on storing them so they stay fresh and crispy.
Whether you’re making these for yourself or impressing guests, these homemade wafer cookies will become a go-to favorite. Let’s dive in! 🚀
Table of Contents
What Are Wafer Cookies?
Wafer cookies are thin, crisp, and light-textured treats that have been enjoyed for centuries. These delicate cookies are known for their air-pocketed structure, which gives them that signature crunch. While they’re often used in layered desserts, ice cream sandwiches, or coated in chocolate, they’re also delicious on their own!
A Brief History of Wafer Cookies
Wafer cookies have European roots, dating back to the Middle Ages when they were baked as thin, crisp sheets over open flames. Over time, different cultures developed their own versions, such as Italian pizzelle, Belgian waffles, and Austrian Manner wafers. Today, they’re a global favorite, found in everything from chocolate bars to gourmet desserts.
How Wafer Cookies Differ from Other Cookies
Unlike traditional cookies that are soft, chewy, or crumbly, wafer cookies stand out because of their:
✔️ Thin, crispy layers that practically dissolve in your mouth.
✔️ Low moisture content, which keeps them light and airy.
✔️ Versatility, they can be used in layered cakes, dipped in chocolate, or eaten as-is.
Whether you’re making a classic vanilla wafer, a chocolate variation, or a fancy dipped version, understanding the science behind wafer cookies is key to making them perfectly crisp and delicious.
Key Ingredients for the Best Wafer Cookies
Creating the perfect crispy wafer cookies starts with the right ingredients. Each component plays a crucial role in achieving that light, delicate crunch that makes these cookies so irresistible.
1. All-Purpose Flour – The Foundation
Flour gives the wafer cookies their structure. Using all-purpose flour ensures a balanced texture, not too dense, not too delicate. For a gluten-free version, you can substitute with almond flour or a 1:1 gluten-free baking blend.
✔️ Tip: Sift the flour before mixing to keep the batter light and lump-free.
2. Cornstarch – The Secret to Crispiness
Cornstarch is the game-changer for wafer cookies. It reduces gluten development, ensuring a lighter, crispier texture. Many commercial wafer cookies use cornstarch for this very reason!
✔️ Tip: If you want an extra-crispy wafer, increase the cornstarch slightly.
3. Powdered Sugar – Sweetness Without Weight
Unlike granulated sugar, powdered sugar dissolves quickly, creating a smooth batter while keeping the cookies light. It also contributes to that melt-in-your-mouth texture.
✔️ Alternative: If using granulated sugar, dissolve it fully in the wet ingredients to avoid grittiness.
4. Egg Whites – The Binding Agent
Egg whites help hold the batter together while keeping it airy and delicate. They also assist in creating the thin, crisp layers that define wafer cookies.
✔️ Tip: For a vegan version, swap egg whites with aquafaba (chickpea water), which mimics egg whites’ binding properties.
5. Butter or Oil – The Flavor Enhancer
A small amount of melted butter adds richness and flavor. Some recipes use neutral oils like coconut or vegetable oil for a lighter texture.
✔️ Tip: Butter provides better flavor, but oil makes the wafers even crispier. Choose based on your preference!
6. Milk or Water – The Liquid Base
Milk adds a touch of richness, while water keeps the cookies ultra-light. Some recipes use evaporated milk for an enhanced depth of flavor.
✔️ Tip: For dairy-free wafers, opt for almond or oat milk.
7. Vanilla or Almond Extract – The Flavor Booster
A splash of vanilla extract adds warmth and sweetness, while almond extract gives wafers a distinct nutty aroma. You can also experiment with citrus zest or cocoa powder for variations.
✔️ Tip: Use pure vanilla extract for the best flavor, artificial vanilla can taste harsh when baked.
Step-by-Step Recipe for Homemade Wafer Cookies

Now that we’ve covered the key ingredients, let’s get baking! Follow this easy, foolproof method to create crispy, light wafer cookies that rival any store-bought version.
Ingredients List
Before we start, gather these simple ingredients:
✅ 1 cup all-purpose flour (or gluten-free alternative)
✅ ¼ cup cornstarch (for extra crispiness)
✅ ½ cup powdered sugar
✅ 2 large egg whites
✅ 3 tbsp melted butter (or neutral oil for a lighter texture)
✅ ¼ cup milk or water
✅ 1 tsp vanilla extract (or almond extract for variation)
✅ A pinch of salt
✔️ Yields: About 20 wafer cookies
✔️ Prep Time: 10 minutes
✔️ Cook Time: 12 minutes
Step 1: Prepare the Batter
1️⃣ Sift the dry ingredients – In a mixing bowl, sift together the flour, cornstarch, powdered sugar, and salt. This helps keep the batter light and airy.
2️⃣ Whisk the egg whites – In a separate bowl, whisk the egg whites until frothy. This step ensures a delicate, crisp texture.
3️⃣ Combine wet ingredients – Add the melted butter, milk, and vanilla extract to the egg whites, stirring until smooth.
4️⃣ Mix everything together – Gradually fold the dry ingredients into the wet mixture, stirring until a smooth, lump-free batter forms.
✔️ Pro Tip: The batter should be slightly runny but not too watery, similar to pancake batter. If the batter feels too thick, mix in a teaspoon of milk to loosen it up.
Step 2: Shaping the Wafer Cookies
1️⃣ Preheat your oven to 350°F (175°C) and line a baking sheet with parchment paper or a silicone baking mat.
2️⃣ Spoon small amounts of batter (about 1 tablespoon) onto the baking sheet.
3️⃣ Spread thinly – Use the back of a spoon or an offset spatula to spread each batter circle very thinly (about ⅛ inch thick). The thinner, the crispier!
4️⃣ Leave space between each cookie to allow for spreading during baking.
✔️ Pro Tip: If you want perfectly round wafers, use a cookie stencil or a round mold for uniform shapes.
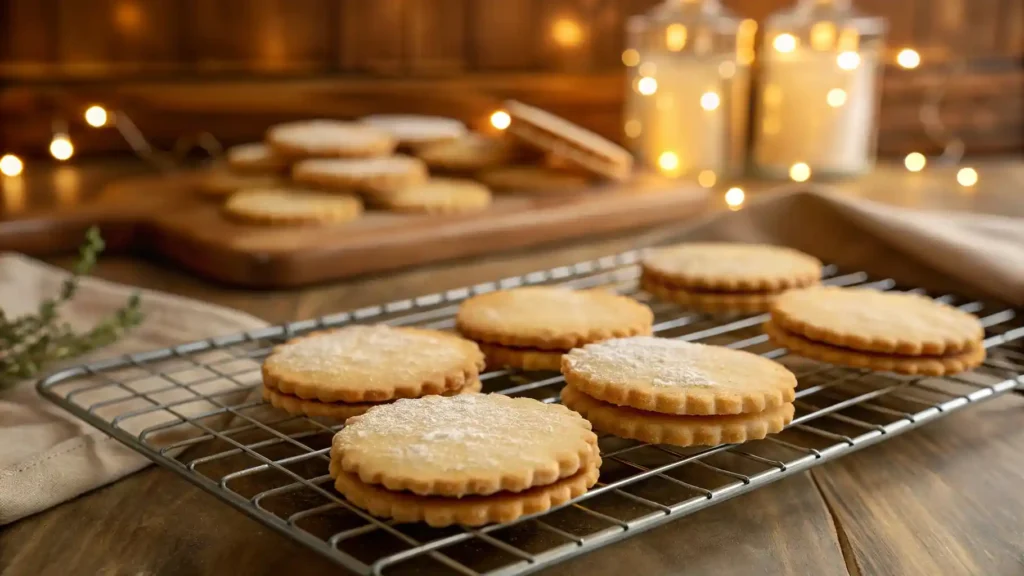
Step 3: Baking for Maximum Crispiness
1️⃣ Bake for 10-12 minutes or until the edges turn golden brown.
2️⃣ Check for crispness – The cookies should feel firm but light. If they are still soft, bake for an extra 1-2 minutes.
3️⃣ Let them cool – Remove from the oven and let the cookies cool completely on the baking sheet. As they cool, they will become even crispier.
✔️ Pro Tip: If you want to make wafer cookie rolls or shapes, mold them immediately after taking them out of the oven while they’re still warm and pliable.
Expert Tips for Extra Crispy Wafer Cookies
Want your wafer cookies to be ultra-thin and perfectly crispy every time? Follow these expert tips to level up your baking game!
1. Use Cornstarch for a Lighter, Crispier Texture
Cornstarch helps reduce gluten formation, keeping the wafers light and delicate. If you want extra crunch, slightly increase the cornstarch by a tablespoon.
✔️ Pro Tip: A 3:1 ratio of flour to cornstarch is the sweet spot for achieving the perfect crispness.
2. Whisk Egg Whites Until Frothy (But Not Stiff!)
Egg whites create air pockets in the batter, making the cookies light and airy. However, over-whipping can make the wafers tough.
✔️ Best Practice: Whisk egg whites until just foamy, no need for stiff peaks!
3. Spread the Batter as Thin as Possible
The thinner the batter, the crispier the cookies. Aim for about ⅛ inch thickness for the best results.
✔️ Pro Tip: Use an offset spatula or the back of a spoon to evenly spread the batter. If it’s too thick, add a teaspoon of milk or water.
4. Bake at the Right Temperature (and Watch Closely!)
Baking at 350°F (175°C) is ideal, but the exact baking time may vary depending on your oven.
✔️ Golden Rule: As soon as the edges turn golden brown, they’re done! Overbaking can make them brittle, while underbaking leaves them soft.
5. Cool Completely Before Storing
Cooling is crucial for crispiness. If stored while warm, moisture gets trapped, making them soft.
✔️ Best Practice: Let them cool completely on a wire rack before placing them in an airtight container.
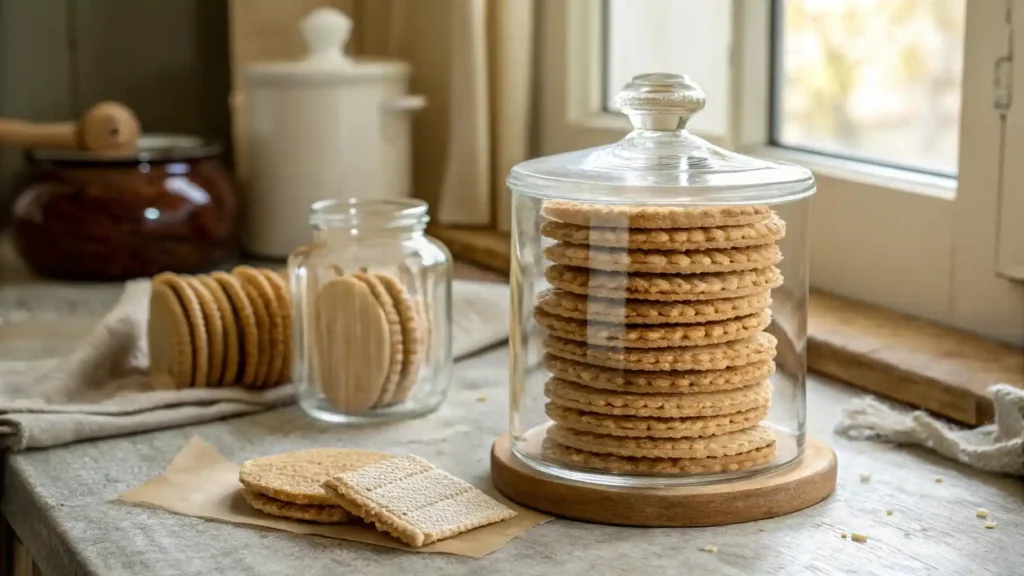
6. Want to Keep Them Crispy for Days? Store Them Right!
Moisture is the enemy of crisp cookies. Here’s how to keep them fresh:
📦 Airtight Container: Store at room temperature for up to a week.
🔥 Re-crisp if needed: Pop them in a 300°F (150°C) oven for 5 minutes to refresh the crunch.
❄️ Freeze for Later: Store in a sealed container in the freezer for up to 3 months.
✔️ Pro Tip: Place a paper towel or silica gel packet in the container to absorb excess moisture.
Wafer Cookie Variations & Serving Ideas

Homemade wafer cookies are incredibly versatile, and with a few tweaks, you can create delicious variations to suit any craving. Whether you love chocolate, nutty flavors, or something fruity, here are some fun ways to customize your wafer cookies!
Flavor Variations
🍫 Chocolate Wafer Cookies
- Mix in 2 tablespoons of cocoa powder to infuse the batter with a deep, chocolatey taste.
- Increase the sugar slightly to balance the bitterness of the cocoa.
- Perfect for making homemade ice cream sandwiches!
🥥 Coconut Wafer Cookies
- Replace half of the flour with finely shredded coconut for a tropical twist.
- Use coconut milk instead of regular milk for extra coconut flavor.
🌰 Nutty Almond Wafers
- Swap vanilla extract for almond extract to enhance the nutty taste.
- Sprinkle finely chopped almonds on top before baking for added crunch.
🍯 Honey or Maple Wafers
- Replace some of the sugar with honey or maple syrup for a naturally sweet variation.
- These pair beautifully with tea or coffee!
🍊 Citrus Zest Wafers
- Add lemon, orange, or lime zest for a refreshing, zesty flavor.
- Serve with berry compote or lemon curd for a gourmet dessert.
Fun Ways to Serve Wafer Cookies
🍦 Wafer Ice Cream Sandwiches
- Layer two wafers with your favorite ice cream in between.
- Freeze for at least 1 hour for the perfect handheld treat.
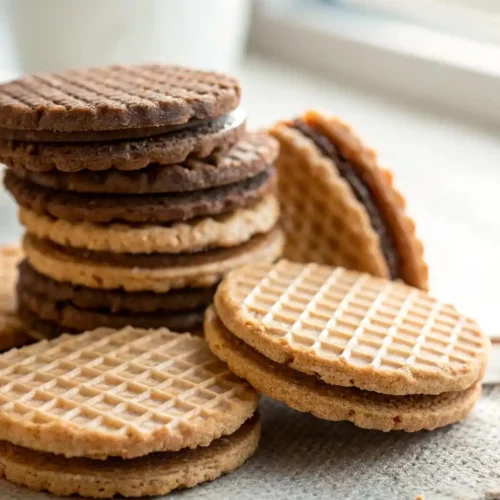
🍫 Dipped in Chocolate
- Melt dark, milk, or white chocolate, then dip the wafers halfway in.
- Sprinkle with crushed nuts, coconut, or sprinkles for a decorative touch.
🍓 Layered Desserts
- Crushed wafers make an excellent base for cheesecake or mousse.
- Use them as layers in a trifle with whipped cream and berries.
☕ Perfect Coffee Companion
- Serve with espresso, cappuccino, or tea for an elegant treat.
- Try dipping them in hot chocolate for a delicious twist.
Final Thoughts & Recipe Recap
Now you have everything you need to make perfectly crispy, light, and delicious homemade wafer cookies! With the right ingredients, baking techniques, and expert tips, you’ll get that signature delicate crunch every time.
Quick Recipe Recap:
✔️ Thin, crispy texture – Thanks to cornstarch and perfectly whisked egg whites.
✔️ Endless variations – From chocolate to coconut and almond flavors.
✔️ Multiple serving ideas – Enjoy them plain, dipped in chocolate, or layered in desserts.
✔️ Perfect for storage – Keep them fresh in an airtight container for up to a week!
Now it’s your turn! Try this wafer cookie recipe today and let us know how it turns out. Share your creations in the comments, and don’t forget to pin this recipe for later!
🚀 Craving more easy and delicious homemade treats? Check out our [related recipes] for more inspiration!
Crispy & Light: The Ultimate Homemade Wafer Cookies Recipe
Equipment
- 1 Baking Sheet Lined with parchment paper
- 1 Offset Spatula For spreading batter evenly
- 1 Mixing Bowl Medium size
- 1 Whisk For mixing ingredients
Ingredients
- 1 cup All-Purpose Flour Sifted
- 2 tbsp Cornstarch For extra crispiness
- ½ cup Sugar Granulated
- ¼ tsp Salt Enhances flavor
- 2 Egg Whites Lightly whisked
- ½ cup Milk Whole or 2%
- 1 tsp Vanilla Extract Or almond extract for variation
- 2 tbsp Melted Butter Unsalted
Instructions
- Preheat oven to 350°F (175°C) and line a baking sheet with parchment paper.
- Mix dry ingredients: In a bowl, whisk together flour, cornstarch, sugar, and salt.
- Prepare wet ingredients: In another bowl, lightly whisk egg whites until frothy. Stir in milk, vanilla extract, and melted butter.
- Combine: Gradually add the wet mixture to the dry ingredients, whisking until a smooth, thin batter forms.
- Spread batter thinly: Use an offset spatula to spread the batter into ⅛-inch-thick circles on the baking sheet.
- Bake: Place in the oven and bake for 8-10 minutes, or until the edges turn golden brown.
- Cool & serve: Let the wafers cool completely on a wire rack before serving.
Notes
Want flavored wafers? Try adding cocoa powder, citrus zest, or cinnamon!
Store in an airtight container for up to 1 week or freeze for 3 months.
FAQ
Why Are My Wafer Cookies Not Crispy?
If your wafers are coming out too soft, here’s why:
✅ Batter Too Thick – Ensure the batter is thin and spread evenly for a light texture.
✅ Underbaked – Bake until the edges turn golden brown for maximum crispness.
✅ Moisture Exposure – Store in an airtight container to prevent softening.
✔️ Fix It: If your wafers soften over time, pop them in a 300°F oven for 5 minutes to re-crisp them!
Can I Make Wafer Cookies Without Eggs?
Yes! Substitute 2 tbsp aquafaba (chickpea brine) or 1 tbsp ground flaxseed + 2 tbsp water for a vegan-friendly version.
How Do I Get Perfectly Round Wafer Cookies?
For uniform shapes:
Use a cookie stencil or draw circles on parchment paper as a guide.
Spread the batter evenly with an offset spatula for a smooth finish.
✔️ Pro Tip: A piping bag helps control the shape and size of the wafers.
Can I Make These Ahead of Time?
Absolutely! Wafer cookies store well when kept in an airtight container for up to a week at room temperature.
✔️ Pro Tip: Freeze wafers in a sealed container for up to 3 months. Re-crisp in the oven before serving.
Can I Use Wafer Cookies in Other Desserts?
Yes! Wafer cookies are perfect for:
🍦 Ice cream sandwiches
🍰 Cake layers & cheesecake bases
🍫 Chocolate-dipped treats
🍓 Layered trifles with fruit & cream
✔️ Pro Tip: Crush leftover wafers for a crispy topping on desserts.